
How to Set up & Use Google Authorship on WordPress w/ Photos
Setting up Google+ Authorship on WordPress is ridiculously easy. I’ll walk you through the process in three easy steps.
Here are all of the things you’re going to need:
- Google+ Account
- Access to WordPress
- Yoast Plugin OR ability to modify author feature
Step 1. Preparing your Google+ account
The first thing you’re going to need for authorship attribution is a Google+ account. You can sign up for one here if you don’t have one (although odds are you do).
Add a link on your profile pointing towards your content
Once logged into your account, you’re going to want to add a link on your profile page to the website where your content appears.
1. Click on “Edit profile”.
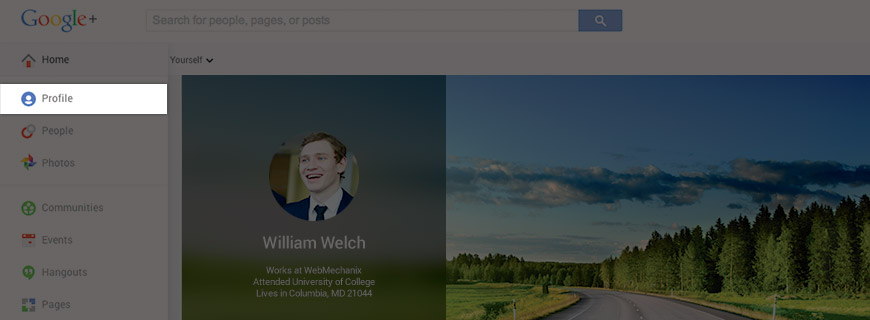
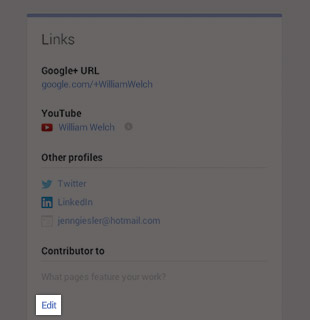
2. Scroll down to the “Contributor to” section and add the site where your content appears.
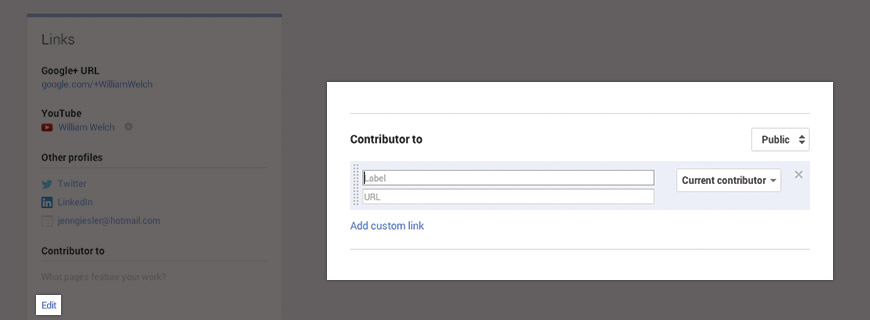
3. Add the website where you want authorship attribution to appear.
Step 2. Preparing your WordPress site
With your Google+ link pointing to the right place, it’s time to get a link from your WordPress site. There are two options you can use to set up your WordPress site for authorship attribution.
Option 1 – Using the Yoast plugin
The Yoast plugin offers a whole bunch of functionality — one of which is the ability to add Google+ Authorship attribution to your posts. To get started, you’ll need to log in to WordPress.
1. Search for new plugins.
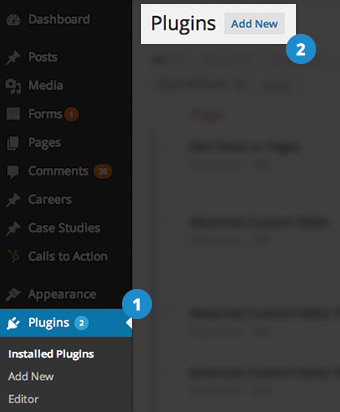
2. Find the Yoast Plugin and install.

3. One installed, click on the user profile for the individual you want to attribute authorship for (if they don’t have a user profile in WordPress you’ll have to create one for them). Add your Google+ URL in the box for Google+.

4. Dance and be merry!
Option 2 – Using the WordPress author feature
Every WP site has author information automatically built in to user profiles. Using this author feature gives you the ability to add a custom message about the author of a post. Note, to use this each author needs to have their own WordPress user account.
1. Add this plugin first, OR just add this line to your functions.php file:
remove_filter(‘pre_user_description’, ‘wp_filter_kses’);
2. Click on the user who you will be assigning the authorship.

3. Add an author biography for the user.

4. Make sure it shows up on the page.

Step 3. Test to make sure things worked
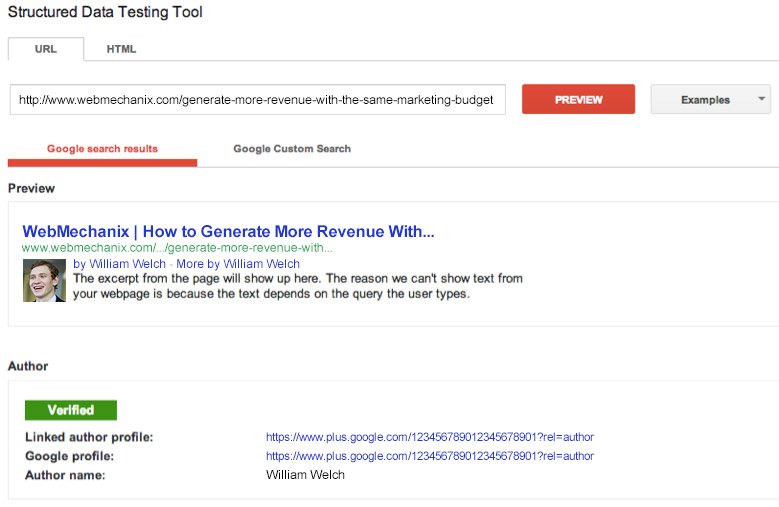
Use the Google rich snippet testing tool to make sure the profile is verified and there were no hiccups.
Just grab the URL of a page that should be attributed to the author and plug it into the tool.
Making the most of Google authorship
Authorship can help a lot. It helps click through rates on the search engine results by adding a picture of you next to the content, it helps people find more content by you, and it allows them to add you to their Google+ circles.
Another little known benefit about Google Authorship is “Author Stats”. While logged into your Google account, go to Google Webmaster tools.
1. Click on “Labs” and then click “Author Stats”.
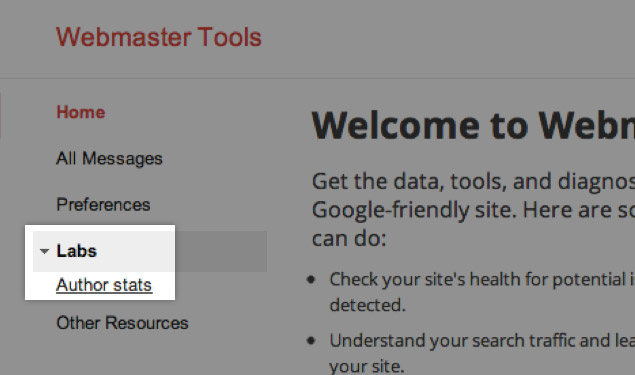
2. Find out how your content is performing on your own site, and more importantly, on others sites.

Still confused? Our custom WordPress Design and Development Services have years of experience carefully crafting web design that attracts and converts leads, and is here to help!
Other resources
- Google’s explanation of Authorship
- Mark Traphagen’s post about why brands shouldn’t fear assigning authorship
- AJ Kohn’s post about the future of authorship
Most newsletters suck...
So while we technically have to call this a daily newsletter so people know what it is, it's anything but.
You won't find any 'industry standards' or 'guru best practices' here - only the real stuff that actually moves the needle.
You may be interested in:
Big list of 1,500+ AdWords PPC negative keywords
March 27, 2020


